Friday, 28 November 2014

Having Fun!...

Meet a charm pack of Winterlude (3 Sisters) by Moda...


What to make that is simple, yet fun with them?....I know!  Let's make flags/pennants for the Christmas tree.


The pennant is easy.  Take a square, fold diagonally and sew up one side.  Here the 'chain' is in progress.  Once you get them sewn together....


Cut them apart and turn them right side out- getting a nice point.  The seam goes to the middle of the back of the pennant.


Then you press them.  To help centre the back seam, press the point sticking up on top - to the seam on the back and it will help give a regular shape to all the flags.


Next, what to attach them to?  I had this red flat cord on hand.  You could use ribbon, string, cord- whatever is on hand or easy to procure.  


The cord is laid on top of the flag, then...

The extra part of the flag on the top is tucked under the seam.  Then...


The flag is flipped over and now it's time to stitch the top of the flag down.  I stitched along the cord when there was no pennant. 


Looking at the back, there is now only a small area on each side that has exposed raw edges.


They ended up being added on in about 1 inch increments.  That wasn't planned- it just looked right.  All together the pennants are a little over 5 metres/yards long and about 8 or 9 flags per yard/metre.  
The ends of the cord have a simple knot tied in them.


Aren't they festive!  They are just fun.  Alas, they were still too big for the Christmas tree, but they look great here!   

Back to the drawing board or ironing board!...


2.5 inch squares! Or Moda Candy or a mini charm pack.  This one is The Boathouse (Sweetwater) by Moda.  Currently in stock, Christmas Countdown, Paisley Park, Patchwork Garden, Crazy for Red, The Lake House and The Boathouse.  All are by Moda and assorted fabric designers.  Mrs P's sells these mini charms for $5.95 each or 2 for $10.00. Please email if you need more info on what's available in stock.  There are too many 5" packs to name here. 


All neatly pressed...same method as above...but what to attach these to?  All the cord and small ribbon I had, seemed wrong...


Nothing, was decided upon!  The back corner is tucked in (as though going over the cord) and then the other part is rolled over, same as if there was a cord there, and stitched.  This time there is no cord, the flags are chain pieced and held together with the thread!  It was easier to sew these with their backs up. 


So, the tree is purple, but the size is right!  The thread also allows the flags to hang easier in the tree.
As an important note, if using cloth near a tree with lights, please use the cool to touch LED lights, not the bulbs in my pic, they will get hot and could pose a fire risk as cotton is a fibre, that can and will burn.


About 6 or7 empty stitches were 'sewed' between the pennants.   The end product is around 2.5 yards/metres long and about 6 flags in 12 inches.  

These were fun projects to sew!  When I get the mini one positioned better, I'll post a better pic of it.   The 'end product' could also be called, bunting or garland!

Remember, if you don't have access to charm packs, you may cut 5 inch squares ( or any size you would like)  from fat quarters or other yardage of your favorite prints.  One 5 inch width of fabric would yield 8 five inch squares...

Have fun! 


Monday, 17 November 2014

Chasing a Fun Tradition...

Every year since 1971, Nova Scotia donates a tree to Boston for their holiday season.  It is a thank you to the people of Boston from the people of Nova Scotia for the help Boston provided during the Halifax Explosion many years ago.  

Last year, I was all exited and ready to go see the 2013 tree to Boston go by on the Highway, when my plans fell apart, as the tree left via Digby.  This year, the tree is not only going by Amherst on its exit from the province, it's STOPPING at the Visitor Information Centre in Fort Lawrence for an official pit stop! 

I'm closing the shop early ( at 3pm) Tuesday to go see the tree.  It sounds 'sappy', but I've never seen the tree and I really think it's an important part of our Nova Scotia history and a great tradition.  The tree is scheduled to arrive between 3/3:30 pm.  

For more info http://novascotia.ca/treeforboston/ or follow via Twitter @TreeForBoston 


Meanwhile, the table top using Halloween squares has morphed into enough squares for a lap size quilt.


Some Ghastlies by Alexander Henry have been fussy cut into the project as well.


And just to keep you up to date, Atelier (3 Sisters) by Moda have arrived...


There are some beautiful paisleys in this fabric line.  


Sunday, 26 October 2014

Trick or Treat? ....

For people that have not quilted before or have limited sewing hours, Mrs P's would like to share this 'quick' way to start making a simple quilt top...

Be warned that 'quick' is relative!  Time is still required to enhance your skill of quilting.


It starts with a 5 inch x 5 inch 'charm' square pack.  People like the 5x5 inch square packs with all the colours from one line.  They are simple, the colours work with each other and someone else has cut them already for you! ( quicker than cutting your own) If you are a beginner quilter, they are also a modest investment of $12.95 ( plus tax). 

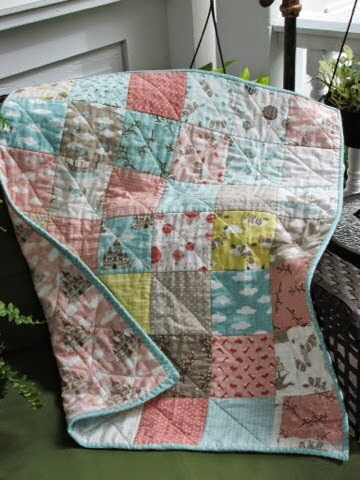
Remember the baby quilt...


But beside making a quilt with 5x5 squares side by side, what can you do with them?...

For this project, 2&1/2 inch strips width of fabric (WOF)  were cut to go with the squares.  One strip had 8 single 5x5 squares sewn to it.


Then the stripes were laid out and the squares were cut off the strip- no measuring yet...


These 'squares' were then sewn on another strip and when cut apart...


They were rectangles and still no measuring!  The left corner has another strip folded waiting to add onto the long sides of the rectangle.  Again the new 'square' is added to the strip and then cut apart.  That lopsided square is then added to another strip and cut apart to form a frame around the original 5 inch square.  All without measuring...making it easier and quicker than measuring & cutting each side to frame the 5 inch square.


An easy way to add more fabric to those squares to make a simple quilt. 


By doing this, the original squares become the focus of the quilt and seem to float.   Your background fabric forming the frame also allows you to have a a less stressful time matching the seam lines of your blocks. 


As a different look,  here an 'unfinished' sqaure sits between finished blocks.  Note, the different look as each original square is surrounded by a 2&1/2 inch border.  Either way is fine- it's your creation!  

Witch Hazel by Riley Blake are the squares and there was only 21 blocks in the pack.  The frame fabric is by Alexander Henry and one of the Ghastlie backgrounds.  I may have added some other fun prints to make 24 blocks...like Sebestian, the cat from the Ghastlies. 

To make 24 blocks, 1.25 metres in total of background was used. The block should finish at 9 inches but I sewed them on a machine that does not have a 1/4 inch foot so they finished at 8 & 3/4 inches, which for me is fine.  The key to this project is consistency in your stitching. 

I haven't put the squares together yet.  I was aiming for a table topper but it might have morphed into something bigger.  I'll post the final measurements and pictures soon.  

It's really can be that simple to start quilting! 

Trick or Treat!


Mrs P's and the 'Terrible' 2's...

Its hard to believe but Mrs P's is in 'her' 2nd year of business as a quilt shop!  That's pretty cool ! 

Thank you to all who have dropped in or emailed supporting the shop ( & me) with kind words of encouragements, gentle nudges to carry certain items and for purchasing items, no matter how small or big.  Purchases are obviously important for a shop but sometimes you just need to browse to get inspiration and that's okay, too.  I want you to feel comfortable in the shop and browse.  It's a place for you to come and enjoy yourself.  

I have also learned I like seeing what you have created!  I'm very envious of every finish but sometimes, someone will bring in a project in progress and that's really neat too. I will encourage you all to look at your 'works in progress' and try them again.  Why did you stop- you didn't like the colour choices, the blocks didn't go together as easily as expected or you got busy and forgot how much fun it is to create something yourself?  What ever the reason it got set down, I encourage you to pick it up and go a bit further on it.  

Just to put unfinished projects in perspective, Mrs P's started a Half Square Triangle (HST) blog post for you.

To make a 'proper' HST a pencil line is marked on the diagonal on one side...


A sharp pencil with a soft point is recommended.  I used a dull one, and sometimes it got hung up on the fabric and that's the 'pulls' you see on the white squares.  If you look even closer, one end took 2 or 3 lines to get to the point!  Somedays, you should just stop, but I persevered...


The one on the left shows shows the stitching a 1/4 inch from the pencil line with the lines fairly parallel.  If you look closer, you will see in my eagerness, I stitched right through the pencil line the 1st time.  I did that for 2 or 3 before, I clued in what I was supposed to be doing.  In my head- a line, whoopie!  I have something to sew on!  

The 2nd square shows another whoopsie.  On the 3rd one, parallel or 2 lines running side by side are more like converging lines and the 4th one seems to be reasonable.

Needless to say, I will continue to work on HSTs and when I am able to make them fairly proficiently, I will blog about them.  I share the above pictures so that you will realize, your quilting and piecing skills will not get better unless you practise!  It doesn't mean that I cannot do HST; it means, I am learning from my mistakes and practice is needed.  

Like in business, quilting takes patience and ground work or skills need to be worked on before the bigger quilt is made.  Take your time and enjoy quilting.  It is a wonderful way to find things out about yourself.  Being 2 isn't so terrible, as long as I keep learning! 


Tuesday, 21 October 2014

I can not wait any longer....drumroll please...

Thank you to everyone who participated in the Nova Scotia Fibre Arts Festival this past week!

I can't wait any longer!  I was at the official and public Pin It Draw on Sat afternoon at 2 pm. I waited until now because I think it's only right that the Fibre Arts Festival officials get a hold of the winners and that the winner should know 1st!  I'm old, what can I say.  

I am now posting the list of names and prizes they won, in part because I had a lot of calls over the past 2 days, who won the trip? Mrs P's donated a trip for two to New York City via Showcase Productions ( also an Amherst group)  in support of Karen Neary ( another Amherst connection)  and her fabulous New York Beauty quilts.  (Some of those quilts were on display last week during the festival. Hope you had time to drop in and see them.)


Please note that I may have names spelled wrong or changes may have occurred if people had to refuse a prize. The official list would be with the NS Fibre Arts Festival.  Please check with them to confirm if your name is here and you have not been notified. I may have goofed and I apologize!  

Drumroll please .....

The New York trip- Congrats to Jan Boiduk
Karen's NY, NY quilt- Congrats to Heather Kellerman
Hand Woven Scarf- Congrats to Carol Gothreau
Cowl- Congrats to Faith Drinnan
Tapestry Bag- Congrats to Tammy Goodwink
Cross Stitch Kit- Congrats to Suzanne Costin
Shawlette- Congrats to Beth Dickinson
Crazy Quilt Pillow- Congrats to Katrina Furlong
Workshop-Congrats to Gail Baker
Moccasins - Congrats to Barb Black
Baby Booties/Brooch- Congrats to Diane Champagne
Handwoven Scarf- Congrats to Carol Baldock

Like I mentioned earlier....I may not have all the spellings right so please check with the NS Fibre Arts Festival to learn more. 

Thank you to all who bought a ticket and helped to support the NS Fibre Arts Festival.  


Saturday, 11 October 2014

Introducing, The Flannel & Panel Room...

The Nova Scotia Fibre Arts Festival starts on Tuesday!  Mrs Pugsley's Emporium Inc will be open at 10 am.

In order to give more room to move around in the main room, I decided to locate the flannels and panels to the back room!  

Introducing the Panel & Flannel Room...


Some panels are pinned to the wall with spares on the racks.  The flannels are in the cart.  On the right, just out of the picture, is where the Paper Pieces are hanging in an semi-organized state!  


More than hexies, the company, Paper Pieces, makes stars, diamonds and curved pieces, to name a few.  There are also different sizes of hexies now available.  Drop into the panel/Flannel room to have a browse.

More blogging to come soon! Mrs P's is also tweeting under @MrsPsAmherst 

Thursday, 11 September 2014

It's here too!...


The Fall 2014 issue of Quilter's Connection magazine is here!  On the front cover is local pattern designer and free motion quilter, Karen Neary's spectacular New York, New York quilt! ( kind of poignant to be posting on today- Sept 11th ) 

Peeking out from behind those magazine covers is the actual quilt.  That's a really proud feeling for this quilt shop owner.  It's pretty neat to have both these on display together!  Remember, you could win this quilt for $10 on the NS Fibrefest draw in Oct or now....with the magazine, you have the ability to make one like it!